I've made P a few pairs of underwear now, and I thought I would share my methods with you, since they differ slightly from most of the tutorials I looked at.
Materials:
Cotton knit fabric - I used some old t shirts to cut up, bonus points if you can include some kind of cute logo for the undies
Note: For hygiene's sake, the crotch piece of the underwear should be cut from 100% cotton, even if the rest of the undies aren't.
Elastic - I used regular old 5mm braided elastic, but this is a little bit hard on the skin, so next time I'll try and find some softer underwear elastic or FOE.
Instructions:
Most of the tutorials recommend that you cut up an existing pair of underwear to create the pattern pieces to work from. This is a really good idea for a much loved and worn out pair of undies. But the frugality in me balks at cutting up one perfectly serviceable pair of P's undies in order to create another perfectly serviceable pair of undies. So instead I drew around P's undies as best I could without cutting them up.
You will end up with 3 pattern pieces - a front piece that looks like a curved T shape, a back piece and a kind of triangley squary shape for the crotch piece.
Cut out your fabric, making sure you lay the pieces so that the stretch of the fabric goes across the pattern
I didn't take a photo of this stage, but you all know how to lay out a pattern right?
Next, lay the pattern pieces out, one on top of the other. Lay the front piece on the bottom, right side up. Next lay the back piece right side down, and finally lay the crotch piece, also right side down. Pin all three layers together at the bottom (ie not the waist part of the pieces). Its really important to lay these out in this order so they will all turn the right way out.
Sew/overlock all these pieces together.
Note: I use my overlocker for this entire project, but if you don't have one, a zigzag stitch on your sewing machine should do the job equally well
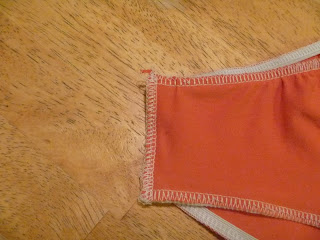
Sew the narrow end of the crotch piece to finish it.
Fold the crotch piece over so that the seam is sandwiched between the crotch piece and the back piece of the undies. It should look a little like an hourglass. If your crotch piece doesn't match up with the sides of your undies, trim the undies so that they do.
Pin elastic to the front and back pieces across the top on the RIGHT side of the fabric - this creates the waistband. To find out how much elastic you need, measure along the top of the pair of undies that you used for the pattern pieces.
Sew the elastic to the right side of the fabric, stretching it as you go along.
Note: It pays to leave a bit of a gap between the top of the fabric and the elastic - this helps to prevent the elastic touching skin. If you are overlocking, DON'T cut the elastic as you go, the gap at the top of the fabric helps with this as well. Just go carefully.
Pin the crotch piece into place, making sure that all the edges line up. Sew the elastic onto the legs, also on the RIGHT side of the fabric. You have two options for working out the amount of elastic for the legs, you can either measure along the length of the undies, and cut accordingly. Or you can keep the elastic on the roll and just sew it onto the sides of the undies - there is no need to stretch out this elastic, its mostly just to keep the undies comfortable when they are on.
Once you have sewn up the sides, the crotch piece should also be attached, with just the finished top edge not attached to the undies - it should remain pretty secure.
Once all the elastic is attached it should look like this.
You're nearly finished! Sew the side seams - double check that they are right sides together.
Turn them right side out and admire your handiwork
Including cute logo on the bum.


